.png)
Face-Recognition model using open-CV and Machine Learning :
● Firstly, visit https://www.tensorflow.org/install
and make sure that you meet necessary requirements for the installation of tensorflow.
● Install python 3.8
● While installing add path in environmental variable and restart the system.
● Make a virtual environment if required using packages like virtualenv or conda.
● Create new environment folder add that new environment path in environmental variable for AI with python 3.8
Run this commends to create new environment and activate it change the locations according to your requirement,
● Now clone the following repository in the directory you would like to work in.
● Now the whole code has been divided into two python notebook files.
● The first python notebook does the task of Data collection and labelling.
● The second one is used to train and test the model.
● Install visual studio and visual c++ build tools restart your system
https://visualstudio.microsoft.com/visual-cpp-build-tools/
● Install any python ide and open image & data collection file and choose the virtual environment which newly created .
● On the top you will see the option of kernel click on it and then press change kernel and select the name of your virtual environment.
Dataset-Collection :
● The first step in the dataset-collection notebook is to import important modules that are required for the project.
import os
!pip install opencv-python
!pip install --upgrade pyqt5 lxml
!pip install python-git
● In the second step we make a list of items that we want to classify.
import cv2
import uuid
import os
import time
● The third step automatically creates important directories for this project which would be further used to store images in.
labels = ['giri','rasika','nivetha','naveena','pradhiksa','ranjani','kishore','karthi']
number_imgs = 6
● At step4 if labeling code not downloaded in C:\Users\Dell\Desktop\CI_AI\Facial_Recognition\Tensorflow\labelimg
● Download manually in the same which is in code and extract it to the above mentioned location.
IMAGES_PATH = os.path.join('Tensorflow', 'workspace', 'images', 'collectedimages')
if not os.path.exists(IMAGES_PATH):
    if os.name == 'posix':
        !mkdir -p {IMAGES_PATH}
    if os.name == 'nt':
         !mkdir {IMAGES_PATH}
for label in labels:
    path = os.path.join(IMAGES_PATH, label)
    if not os.path.exists(path):
        !mkdir {path}
● Use this cell only if you want to capture images directly from your webcam through an automated script. It is recommended to do this process manually or even better get a dataset from the internet.
LABELIMG_PATH = os.path.join('Tensorflow', 'labelimg')
if not os.path.exists(LABELIMG_PATH):
    !mkdir {LABELIMG_PATH}
    !git clone https://github.com/heartexlabs/labelImg {LABELIMG_PATH}
if os.name == 'posix':
    !make qt5py3
if os.name =='nt':
    !cd {LABELIMG_PATH} && pyrcc5 -o libs/resources.py resources.qrc
!cd {LABELIMG_PATH} && python labelImg.py
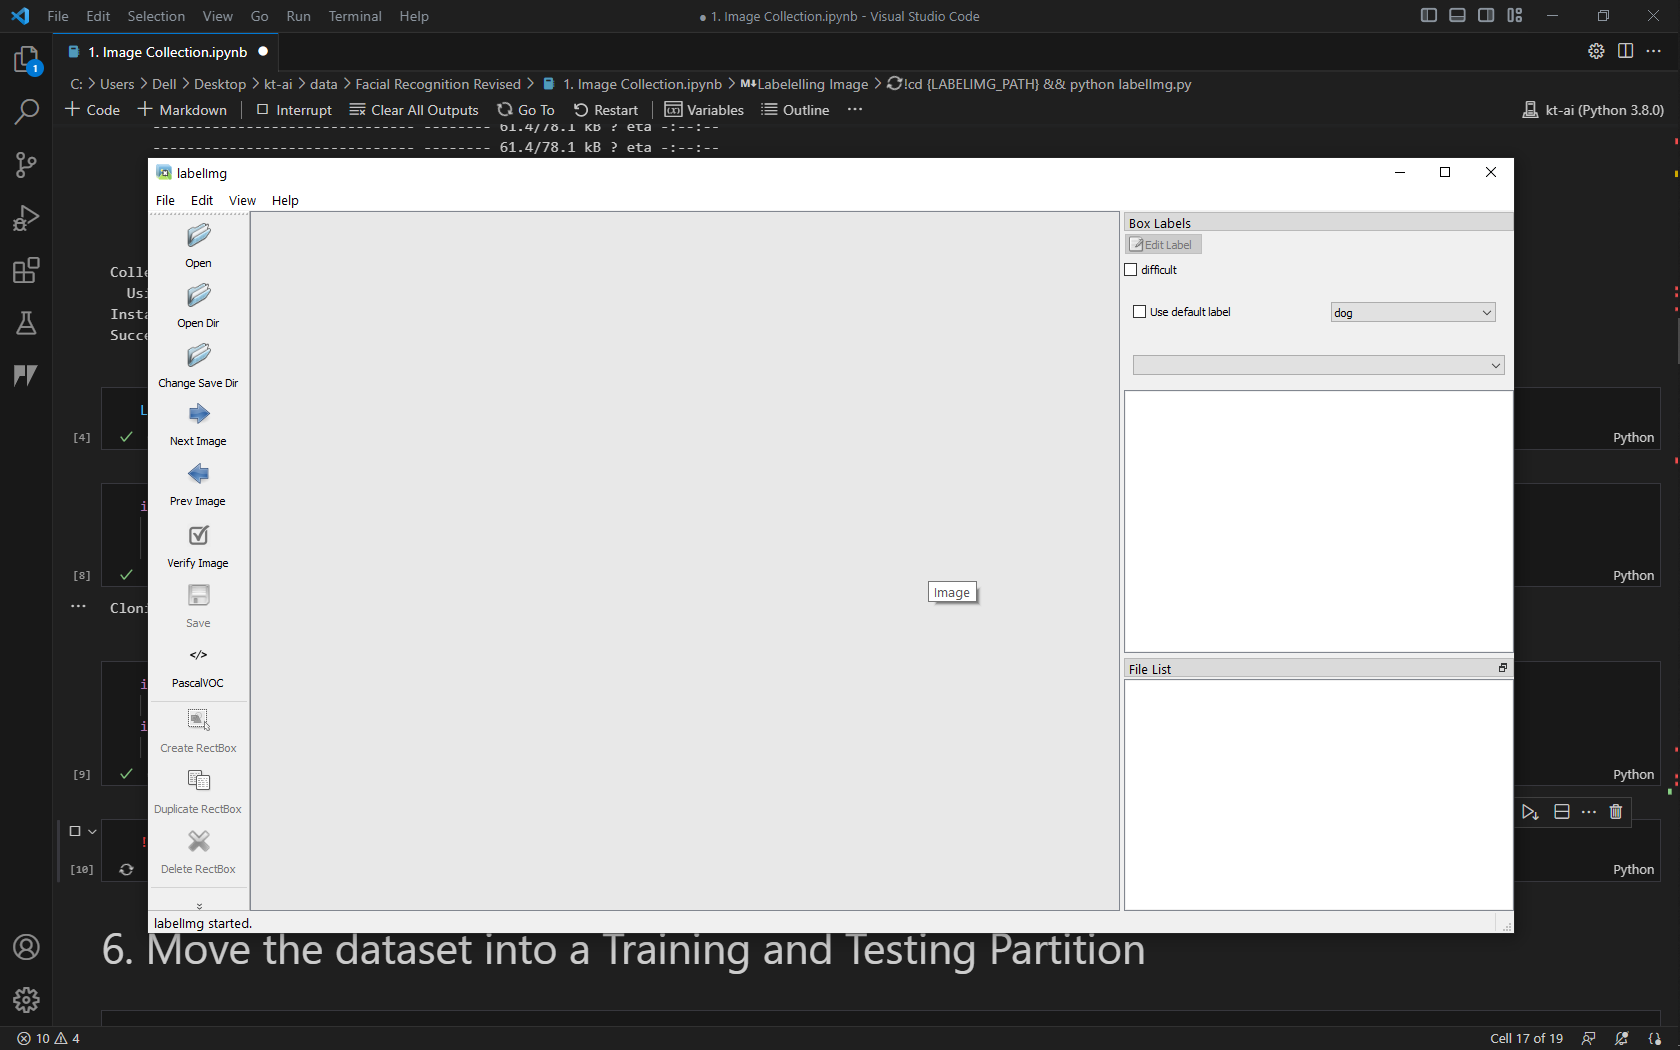
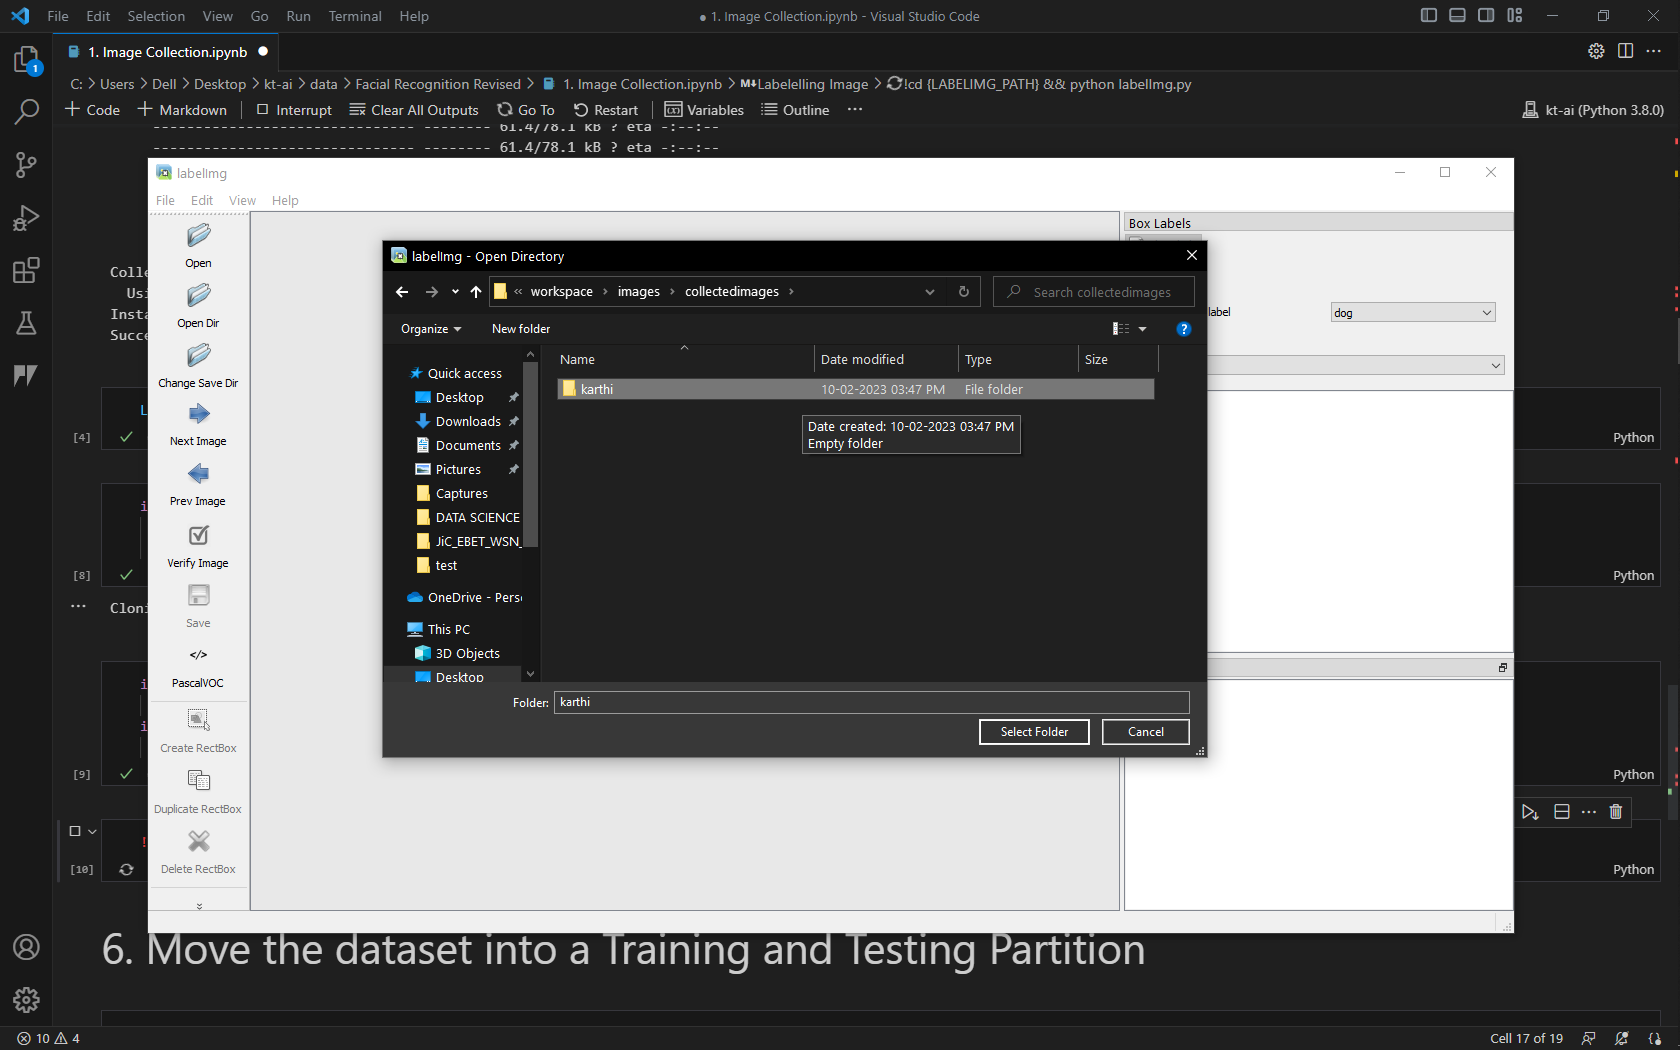
● After the collection of image we now have to label these images using labelimg software which will allow us to draw a bounding box around the region of our interest. When the software is opened click on “open dir” and then select the directory in which images for a particular class are present. After the image has been loaded press w and make bounding box and give the label to that region which should be same as you defined in the label list above. And save it using Ctrl+s.


import shutil
import os
import fnmatch
import math

dir=r'C:\Users\Dell\Desktop\CI_AI\Facial_Recognition\Tensorflow\workspace\images\collectedimages'
train_path=r'C:\Users\Dell\Desktop\CI_AI\Facial_Recognition\Tensorflow\workspace\images\train'
test_path=r'C:\Users\Dell\Desktop\CI_AI\Facial_Recognition\Tensorflow\workspace\images\test'

test=0.1


for folder in os.listdir(dir):
    a=os.path.join(dir,folder)
    count = len(fnmatch.filter(os.listdir(a), '*.*'))
    train_files=2*(math.floor((1-test)*(count/2)))
    proc=0
    for files in os.listdir(a):
        if(proc<train_files):
            file_source=os.path.join(a,files)
            proc=proc+1
            shutil.move(file_source,train_path)

for folder in os.listdir(dir):
    a=os.path.join(dir,folder)
    for files in os.listdir(a):
        file_source=os.path.join(a,files)
        shutil.move(file_source,test_path)
● Create test & train folders in C:\Users\Dell\Desktop\CI_AI\Facial_Recognition\Tensorflow\workspace\images
● The following cell split’s the data in test and train folders using an automated script where you just have to define the path to test and train folder.
Code File :
Model Training and Testing :
● Install git in windows and add path in environmental variable
● Install tf-models-official from terminal
pip install tensorflow
import tensorflow
print(tensorflow.__version__)
import os
CUSTOM_MODEL_NAME = 'Face_Detection'
PRETRAINED_MODEL_NAME = 'ssd_mobilenet_v2_fpnlite_320x320_coco17_tpu-8'
PRETRAINED_MODEL_URL = 'http://download.tensorflow.org/models/object_detection/tf2/20200711/ssd_mobilenet_v2_fpnlite_320x320_coco17_tpu-8.tar.gz'
TF_RECORD_SCRIPT_NAME = 'generate_tfrecord.py'
LABEL_MAP_NAME = 'label_map.pbtxt'
paths = {
    'WORKSPACE_PATH': os.path.join('Tensorflow', 'workspace'),
    'SCRIPTS_PATH': os.path.join('Tensorflow','scripts'),
    'APIMODEL_PATH': os.path.join('Tensorflow','models'),
    'ANNOTATION_PATH': os.path.join('Tensorflow', 'workspace','annotations'),
    'IMAGE_PATH': os.path.join('Tensorflow', 'workspace','images'),
    'MODEL_PATH': os.path.join('Tensorflow', 'workspace','models'),
    'PRETRAINED_MODEL_PATH': os.path.join('Tensorflow', 'workspace','pre-trained-models'),
    'CHECKPOINT_PATH': os.path.join('Tensorflow', 'workspace','models',CUSTOM_MODEL_NAME),
    'OUTPUT_PATH': os.path.join('Tensorflow', 'workspace','models',CUSTOM_MODEL_NAME, 'export'),
    'TFJS_PATH':os.path.join('Tensorflow', 'workspace','models',CUSTOM_MODEL_NAME, 'tfjsexport'),
    'TFLITE_PATH':os.path.join('Tensorflow', 'workspace','models',CUSTOM_MODEL_NAME, 'tfliteexport'),
    'PROTOC_PATH':os.path.join('Tensorflow','protoc')
 }
files = {
    'PIPELINE_CONFIG':os.path.join('Tensorflow', 'workspace','models', CUSTOM_MODEL_NAME, 'pipeline.config'),
    'TF_RECORD_SCRIPT': os.path.join(paths['SCRIPTS_PATH'], TF_RECORD_SCRIPT_NAME),
    'LABELMAP': os.path.join(paths['ANNOTATION_PATH'], LABEL_MAP_NAME)
}
for path in paths.values():
    if not os.path.exists(path):
        if os.name == 'posix':
            !mkdir -p {path}
        if os.name == 'nt':
            !mkdir {path}
● Initially we make necessary folders which we will be using for storing data.
● In the first step we download a pre-trained model which we will be using to perform transfer learning by using our own dataset.
# https://www.tensorflow.org/install/source_windows
if os.name=='nt':
    !pip install wget
    import wget
pip install python-git
if not os.path.exists(os.path.join(paths['APIMODEL_PATH'], 'research', 'object_detection')):
    !git clone https://github.com/tensorflow/models {paths['APIMODEL_PATH']}
# Install Tensorflow Object Detection
if os.name=='posix':
    !apt-get install protobuf-compiler
    !cd Tensorflow/models/research && protoc object_detection/protos/*.proto --python_out=. && cp object_detection/packages/tf2/setup.py . && python -m pip install .

if os.name=='nt':
    url="https://github.com/protocolbuffers/protobuf/releases/download/v3.15.6/protoc-3.15.6-win64.zip"
    wget.download(url)
    !move protoc-3.15.6-win64.zip {paths['PROTOC_PATH']}
    !cd {paths['PROTOC_PATH']} && tar -xf protoc-3.15.6-win64.zip
    os.environ['PATH'] += os.pathsep + os.path.abspath(os.path.join(paths['PROTOC_PATH'], 'bin'))
    !cd Tensorflow/models/research && protoc object_detection/protos/*.proto --python_out=. && copy object_detection\\packages\\tf2\\setup.py setup.py && python setup.py build && python setup.py install
    !cd Tensorflow/models/research/slim && pip install -e .
pip install setuptools
pip install pycocotools
!pip install pyyaml
!pip install gin-config
!pip install google-api-python-client
!pip install immutabledict
!pip install kaggle
!pip install oauth2client
!pip install opencv-python-headless
!pip install py-cpuinfo
!pip install pycocotools
!pip install pyyaml
!pip install sentencepiece
!pip install seqeval
!pip install tensorflow-addons
!pip install tensorflow-datasets
!pip install tensorflow-hub
!pip install tensorflow-model-optimization
!pip install tensorflow-text
VERIFICATION_SCRIPT = os.path.join(paths['APIMODEL_PATH'], 'research', 'object_detection', 'builders', 'model_builder_tf2_test.py')
# Verify Installation
!python {VERIFICATION_SCRIPT}
!pip install tensorflow --upgrade
import object_detection
pip install wget
!pip list
if os.name =='posix':
    !wget {PRETRAINED_MODEL_URL}
    !mv {PRETRAINED_MODEL_NAME+'.tar.gz'} {paths['PRETRAINED_MODEL_PATH']}
    !cd {paths['PRETRAINED_MODEL_PATH']} && tar -zxvf {PRETRAINED_MODEL_NAME+'.tar.gz'}
if os.name == 'nt':
    wget.download(PRETRAINED_MODEL_URL)
    !move {PRETRAINED_MODEL_NAME+'.tar.gz'} {paths['PRETRAINED_MODEL_PATH']}
    !cd {paths['PRETRAINED_MODEL_PATH']} && tar -zxvf {PRETRAINED_MODEL_NAME+'.tar.gz'}
● In the second step we have to define the labelmap which contains the names of all the classes. Please use the same name as you have used above (it is case sensitive).
labels = [{'name':'giri', 'id':1},{'name':'karthi', 'id':2},{'name':'kishore', 'id':3},{'name':'naveena', 'id':4},{'name':'nivetha', 'id':5}, {'name':'prethiksa', 'id':6},{'name':'ranjani', 'id':7},{'name':'rasica', 'id':8}]

with open(files['LABELMAP'], 'w') as f:
    for label in labels:
        f.write('item { \n')
        f.write('\tname:\'{}\'\n'.format(label['name']))
        f.write('\tid:{}\n'.format(label['id']))
        f.write('}\n')
● The third step helps us in creating TF records which will be used by our model for training purpose.
if not os.path.exists(files['TF_RECORD_SCRIPT']):
    !git clone https://github.com/nicknochnack/GenerateTFRecord {paths['SCRIPTS_PATH']}
 !python {files['TF_RECORD_SCRIPT']} -x {os.path.join(paths['IMAGE_PATH'], 'train')} -l {files['LABELMAP']} -o {os.path.join(paths['ANNOTATION_PATH'], 'train.record')}
!python {files['TF_RECORD_SCRIPT']} -x {os.path.join(paths['IMAGE_PATH'], 'test')} -l {files['LABELMAP']} -o {os.path.join(paths['ANNOTATION_PATH'], 'test.record')}
● The fourth and the fifth step is basically preparing the configs before training the model.
if os.name =='posix':
    !cp {os.path.join(paths['PRETRAINED_MODEL_PATH'], PRETRAINED_MODEL_NAME, 'pipeline.config')} {os.path.join(paths['CHECKPOINT_PATH'])}
if os.name == 'nt':
    !copy {os.path.join(paths['PRETRAINED_MODEL_PATH'], PRETRAINED_MODEL_NAME, 'pipeline.config')} {os.path.join(paths['CHECKPOINT_PATH'])}
import tensorflow as tf
from object_detection.utils import config_util
from object_detection.protos import pipeline_pb2
from google.protobuf import text_format
config = config_util.get_configs_from_pipeline_file(files['PIPELINE_CONFIG'])
config
pipeline_config = pipeline_pb2.TrainEvalPipelineConfig()
with tf.io.gfile.GFile(files['PIPELINE_CONFIG'], "r") as f:
    proto_str = f.read()
    text_format.Merge(proto_str, pipeline_config)
pipeline_config = pipeline_pb2.TrainEvalPipelineConfig()
with tf.io.gfile.GFile(files['PIPELINE_CONFIG'], "r") as f:
    proto_str = f.read()
    text_format.Merge(proto_str, pipeline_config)  pipeline_config.model.ssd.num_classes = len(labels)
pipeline_config.train_config.batch_size = 4
pipeline_config.train_config.fine_tune_checkpoint = os.path.join(paths['PRETRAINED_MODEL_PATH'], PRETRAINED_MODEL_NAME, 'checkpoint', 'ckpt-0')
pipeline_config.train_config.fine_tune_checkpoint_type = "detection"
pipeline_config.train_input_reader.label_map_path= files['LABELMAP']
pipeline_config.train_input_reader.tf_record_input_reader.input_path[:] = [os.path.join(paths['ANNOTATION_PATH'], 'train.record')]
pipeline_config.eval_input_reader[0].label_map_path = files['LABELMAP']
pipeline_config.eval_input_reader[0].tf_record_input_reader.input_path[:] = [os.path.join(paths['ANNOTATION_PATH'], 'test.record')]
config_text = text_format.MessageToString(pipeline_config)
with tf.io.gfile.GFile(files['PIPELINE_CONFIG'], "wb") as f:
    f.write(config_text)
● The following step is to train the model with dataset that we had created. This process might take a bit of time to complete depending upon the systems specification.
TRAINING_SCRIPT = os.path.join(paths['APIMODEL_PATH'], 'research', 'object_detection', 'model_main_tf2.py')
command = "python {} --model_dir={} --pipeline_config_path={} --num_train_steps=2000".format(TRAINING_SCRIPT, paths['CHECKPOINT_PATH'],files['PIPELINE_CONFIG'])
print(command)
!{command}
● The seventh step is to evaluate the model and displays certain parameters which can be analysed in determining the performance of the model.
command = "python {} --model_dir={} --pipeline_config_path={} --checkpoint_dir={}".format(TRAINING_SCRIPT, paths['CHECKPOINT_PATH'],files['PIPELINE_CONFIG'], paths['CHECKPOINT_PATH'])
print(command)
!{command}
● Eighth step is to load the trained model inside the script. IMPORTANT:-Please update the parameter inside ckpt.restore, change the ckpt-3 to ckpt-x or ckpt-5(where x is an integer) depending upon the maximum value of x present the (tensorflow->workspace->models->your_model_name) directory.
import os
import tensorflow as tf
from object_detection.utils import label_map_util
from object_detection.utils import visualization_utils as viz_utils
from object_detection.builders import model_builder
from object_detection.utils import config_util
# Load pipeline config and build a detection model
configs = config_util.get_configs_from_pipeline_file(files['PIPELINE_CONFIG'])
detection_model = model_builder.build(model_config=configs['model'], is_training=False)

# Restore checkpoint
ckpt = tf.compat.v2.train.Checkpoint(model=detection_model)
ckpt.restore(os.path.join(paths['CHECKPOINT_PATH'], 'ckpt-3')).expect_partial()

@tf.function
def detect_fn(image):
    image, shapes = detection_model.preprocess(image)
    prediction_dict = detection_model.predict(image, shapes)
    detections = detection_model.postprocess(prediction_dict, shapes)
    return detections
● The ninth step is used if you want to test your model against an image, change the image_path variables value to the file where the image you want to perform recognition on is located.
import cv2
import numpy as np
from matplotlib import pyplot as plt
%matplotlib inline
category_index = label_map_util.create_category_index_from_labelmap(files['LABELMAP'])
IMAGE_PATH = os.path.join(paths['IMAGE_PATH'], 'train', 'WIN_20221207_11_38_05_Pro.jpg')
IMAGE_PATH=r"C:\.others\VS Code files\Python\Krishtec 2.0\object_detection_2.0\TFODCourse\Tensorflow\workspace\images\train\0_75.jpg"
img = cv2.imread(IMAGE_PATH)
image_np = np.array(img)

input_tensor = tf.convert_to_tensor(np.expand_dims(image_np, 0), dtype=tf.float32)
detections = detect_fn(input_tensor)

num_detections = int(detections.pop('num_detections'))
detections = {key: value[0, :num_detections].numpy()
              for key, value in detections.items()}
detections['num_detections'] = num_detections

# detection_classes should be ints.
detections['detection_classes'] = detections['detection_classes'].astype(np.int64)

label_id_offset = 1
image_np_with_detections = image_np.copy()

viz_utils.visualize_boxes_and_labels_on_image_array(
            image_np_with_detections,
            detections['detection_boxes'],
            detections['detection_classes']+label_id_offset,
            detections['detection_scores'],
            category_index,
            use_normalized_coordinates=True,
            max_boxes_to_draw=5,
            min_score_thresh=.8,
            agnostic_mode=False)

plt.imshow(cv2.cvtColor(image_np_with_detections, cv2.COLOR_BGR2RGB))
plt.show()
● The following step is used to perform object recognition using the webcam of your system.
import cv2
import numpy as np
from matplotlib import pyplot as plt
%matplotlib inline
category_index = label_map_util.create_category_index_from_labelmap(files['LABELMAP'])
cap = cv2.VideoCapture(0)
width = int(cap.get(cv2.CAP_PROP_FRAME_WIDTH))
height = int(cap.get(cv2.CAP_PROP_FRAME_HEIGHT))

while cap.isOpened():
    ret, frame = cap.read()
    image_np = np.array(frame)

    input_tensor = tf.convert_to_tensor(np.expand_dims(image_np, 0), dtype=tf.float32)
    detections = detect_fn(input_tensor)

    num_detections = int(detections.pop('num_detections'))
    detections = {key: value[0, :num_detections].numpy()
                  for key, value in detections.items()}
    detections['num_detections'] = num_detections

    # detection_classes should be ints.
    detections['detection_classes'] = detections['detection_classes'].astype(np.int64)


    label_id_offset = 1
    image_np_with_detections = image_np.copy()

    viz_utils.visualize_boxes_and_labels_on_image_array(
                image_np_with_detections,
                detections['detection_boxes'],
                detections['detection_classes']+label_id_offset,
                detections['detection_scores'],
                category_index,
                use_normalized_coordinates=True,
                max_boxes_to_draw=5,
                min_score_thresh=.8,
                agnostic_mode=False)

    cv2.imshow('object detection',  cv2.resize(image_np_with_detections, (800, 600)))

    if cv2.waitKey(10) & 0xFF == ord('q'):
        cap.release()
        cv2.destroyAllWindows()
        break

● The tenth step freezes the model and it’s weights and is then exported using the next step .
FREEZE_SCRIPT = os.path.join(paths['APIMODEL_PATH'], 'research', 'object_detection', 'exporter_main_v2.py ')
command = "python {} --input_type=image_tensor --pipeline_config_path={} --trained_checkpoint_dir={} --output_directory={}".format(FREEZE_SCRIPT ,files['PIPELINE_CONFIG'], paths['CHECKPOINT_PATH'], paths['OUTPUT_PATH'])
print(command)
!{command}
!tar -czf model_face_v1.tar.gz {paths['CHECKPOINT_PATH']}
import os
import tensorflow as tf
from tensorflow.keras.preprocessing import image

New_Model = tf.keras.models.load_model(r'C:\.others\VS Code files\Python\Krishtec 2.0\object_detection_2.0\TFODCourse\Tensorflow\workspace\models\Face_Detection_v1\export\saved_model') # Loading the Tensorflow Saved Model (PB)
print(New_Model.summary())
# Saving the Model in H5 Format and Loading it (to check if it is same as PB Format)
tf.keras.models.save_model(New_Model, 'New_Model.h5') # Saving the Model in H5 Format

loaded_model_from_h5 = tf.keras.models.load_model('New_Model.h5') # Loading the H5 Saved Model
print(loaded_model_from_h5.summary())
Code File :
Click For Tracking-detection file !!!